From the city of Chamonix, the gateway to this alpine range, you reach a forested valley that climbs toward rugged ridges. The loftiest summit in the Western Alps rises to 4,808 meters, with the Goûter Refuge at 3,835 m and the Dôme du Goûter at 4,304 m. For climbers, this route is a long but rewarding ascent, with weather and light that can shift quickly.
A typical cadence is 3–4 days: Day 1 from the valley up to a mid-altitude refuge (about 1,900–2,400 m) to acclimatize; Day 2 to the Goûter Refuge (3,835 m); on the third day a pre-dawn ascent to the Dôme or summit; Day 4 descent to the valley. This plan helps your body adjust and keeps you from missed weather windows.
Dress in thermal layers and waterproof shells; headlamp and spare batteries; conditions shift quickly at altitude. Start early; wind and fresh ice often form after sunrise; rockfalls and seracs can occur as the verte of ice shifts with sun. Stay on marked spots and use fixed lines where present. If mist closes in, turn back; the mountain is unforgiving when a cloud rolls in.
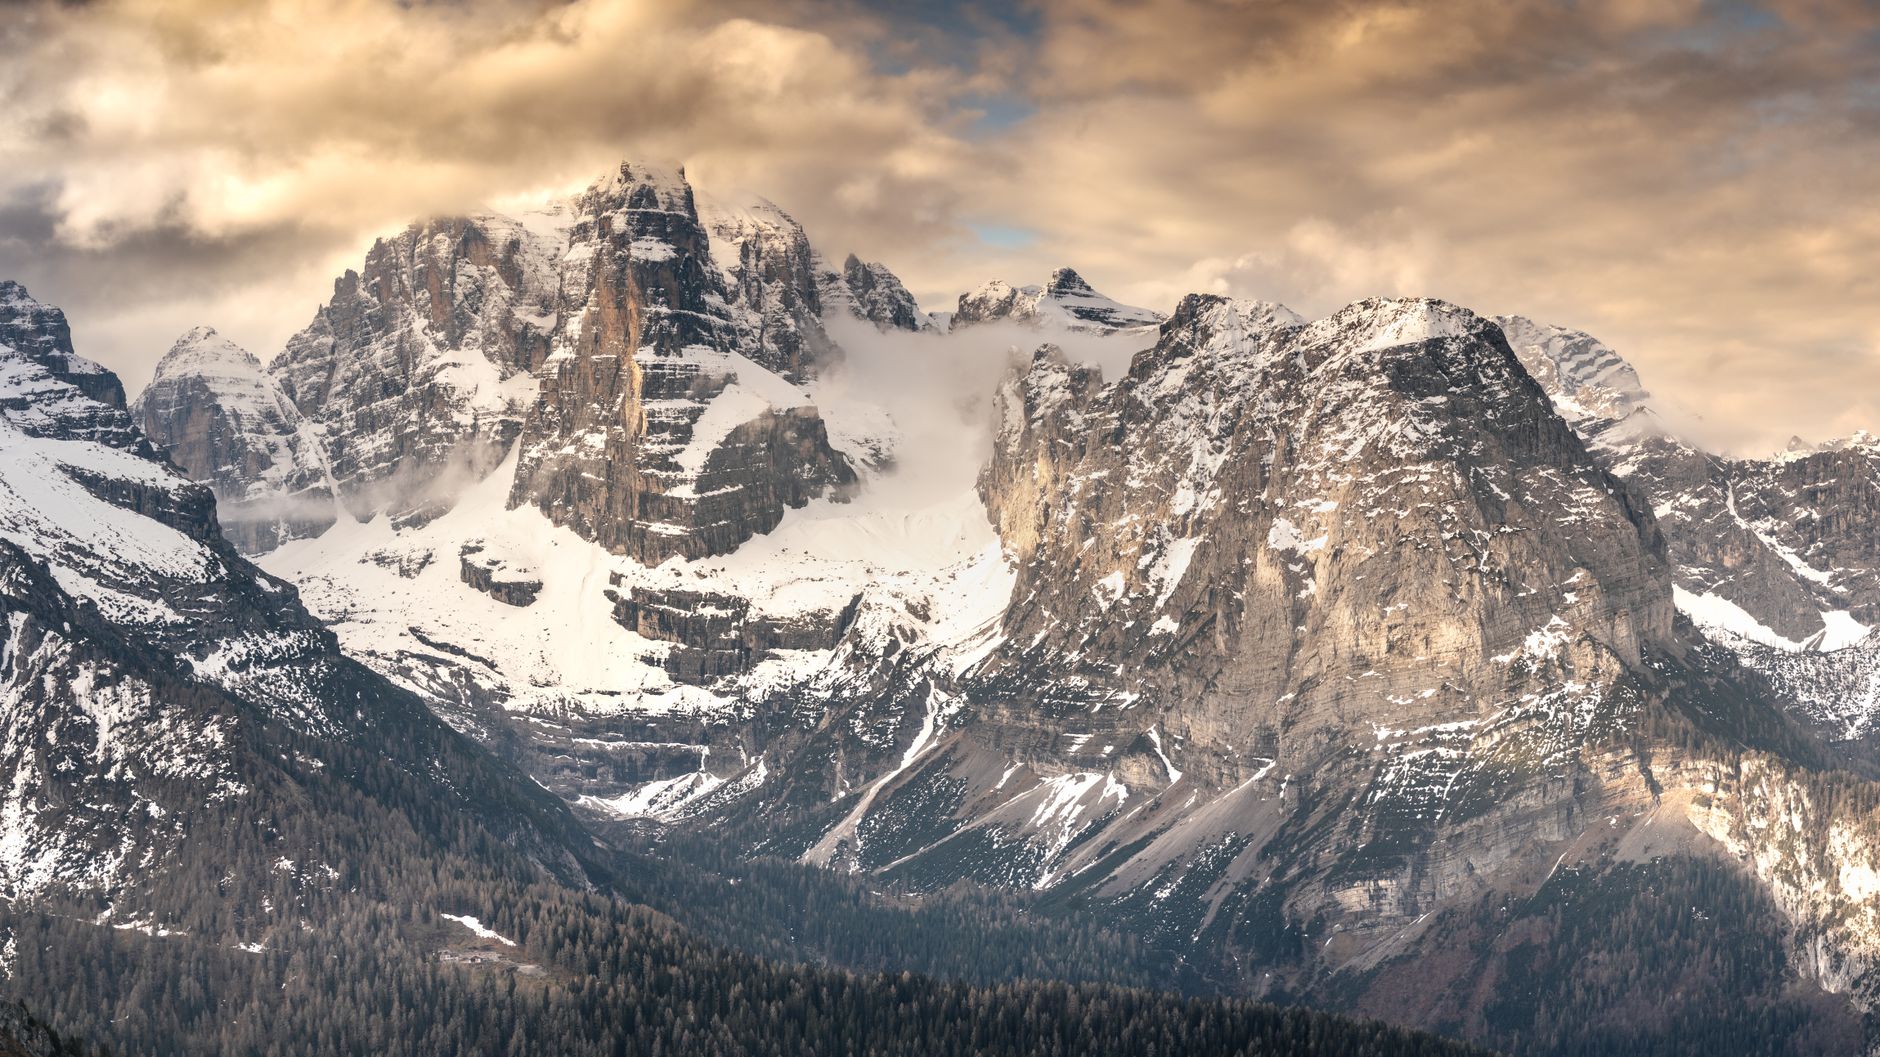
Along the route you pass through a forest belt in the lower slopes, then granite slabs and seracs where the light simply shifts. The whole approach rewards patient pace: the first light on the ridge, the magical glow on the ponds, spots of marmots along the road, and distant crevasses that fracture the ice. Several climbers enjoyed the terrace at a mid-mountain refuge, trading stories with fellow climbers before the dawn push.
Hut timing varies; many refuges are closed outside the core window, so reserve early and in advance. The main window typically runs from late June to September, when meals, heating, and shelter are available and weather opportunities are more reliable. If a weather window closes, be prepared to adjust plans and start the descent, because conditions can change fast and you should understand your limits. The road back to the valley offers a sense of accomplishment and relief.
When you reach the summit and descend, you understand how this road reveals a layered story. The experience makes you feel yourself braver, and many climbers say they enjoyed the sense of space, the forest far below, and how the ice feels underfoot. For them, the change is tangible, a whole moment to hold in memory.
Start early: Start well before dawn, ideally around 01:30–02:30, to use the night window. If you started late, you quickly miss the dawn light and the climb becomes more demanding.
Gear basics: Sturdy boots with solid grip, crampons, helmet, harness, rope for glacier work, and a 2–3 layer clothing system. spent a few minutes testing boots on a short practice walk, adjust laces, and keep a basic medical kit handy. Your pack should be around 8–12 kg depending on season. tips: hydrate and check gear before leaving.
Glacier navigation: The route crosses a glacier with hidden crevasses. Move roped through blue zones, and follow established tracks. A fixed cable can appear on some segments; use it with care. The approach is dramatic and can change quickly, which makes navigation through wind and fresh snow challenging.
Altitude and acclimatization: Time at altitude matters; a night spent at the Goûter refuge helps your body adapt. If you feel headaches, nausea, or dizziness, descend immediately. Your eyes adjust to thinner air, and the landscape looks higher as dawn approaches; the view can feel dramatic and surprisingly stark.
Accommodations and restrictions: The refuge operates under strict restrictions with limited beds and mandatory bookings in peak periods. Tourists should not expect luxury; it is basic with shared dorms. In cases of bad weather the hut may close early; authorities said to check the official schedule ahead of time.
Weather and safety: The weather on the route is dramatic and changeable. Winds on the nord side can be harsh; plan to descend if conditions worsen. Weather isnt predictable; expect rapid temperature drops and possible whiteout; plan for a window that lasts around 4–6 hours in good conditions. In total, the ascent to the hut and return can take an hour or more beyond the light window, depending on pace and conditions.
Practical flow: This route remains popular among tourists; the line tends to fill fast. If you are going in crowds, keep to your pace and avoid blocking rope sections. A cable feature helps in some seasons but does not eliminate risk; looking ahead and anticipating loose rock and slow-moving groups is essential.
Emergency and response: Always have a means of communication; in a medical case call local rescue; if symptoms escalate, turn back. A quick decision can save time and energy; if it feels wrong, you should not press on. The experience offers a sense of marvel and the feeling of being on a grand adventure; it isnt a casual stroll.
Key reminders: Start early; boots are essential; tips from experienced climbers include pacing, staying hydrated, and keeping eyes on the path. If conditions look rough, cancel; a safe decision saves the rest of your trip. The route allows a dramatic sense of accomplishment for those who go prepared.
Start at Nid d'Aigle, reached by a mountain tramway from Le Fayet, and arrive before dawn. Pack equipment for high-altitude travel: wind shell, insulated layers, sturdy boots, harness, crampons if required, helmet, a headlamp, and a lunch. The air is colder above 3,000 m, so adapt layers as you climb. The scenery is magnificent, the route iconic, and you may spot chamois on rock ledges near the pass. There is no elevator here; progress relies on steady steps and proper pacing. If youve trained properly, the feeling of the ascent grows with every ridge crossed and the view becomes truly rewarding.
Alternative access exists via the hamlet of Les Contamines or the Tête Rousse approach. The Tête Rousse Refuge sits around 3,167 m and serves as a named waypoint before the long haul to the Goûter Refuge at roughly 3,835 m. If you arrive late, hut space is limited; some hikers may lack space and sleep in sheltered areas outside. On busy days, hut capacity often lacks, so plan ahead. However, weather can change quickly, so plan a flexible schedule. Japanese climbers and local groups alike join the same route, underscoring the universal appeal. Generally, acclimatization days help most groups feel steadier on the higher ground.
Altitude milestones on the classic line include Nid d'Aigle (~2,372 m); Tête Rousse (~3,167 m); Goûter Refuge (~3,835 m); and the true top (~4,807 m), almost reaching 4,810 m. The route climbs steadily with occasional short descents and long wind-swept flats. The Goûter Needle rises above the trail, offering a sharp silhouette against the sky. Expect sun, wind, and colder air as you gain height. Don’t rush lunch; a well-timed meal keeps energy steady for the second half of the day. The amount of effort required is real, and discovering the silent corners where the chamois pause can be a welcome pause. Some huts also offer basic baths, known locally as bains.
Typical itinerary: a two-day rhythm suits most hikers. Day 1, start from Nid d'Aigle and push to either the Tête Rousse Refuge or the Goûter Refuge, depending on pace and overnight plan; total time often 6–9 hours with a lunch break. Day 2, depart before dawn for a summit attempt, then descend back to the huts and continue down to Nid d'Aigle or return to base. A longer three-day version adds a second acclimatization night in a hamlet or a lower-altitude refuge, which many find makes the climb more forgiving. In discovering the mood at the top, groups of hikers often move as a tight unit, and theyve done something truly memorable. Remember to keep the group small, monitor each member's condition, and be prepared for days when weather trims the plan. Some routes report a lack of space in peak periods, so reserve hut space well in advance; an eternal view from the summit makes the extra planning worthwhile.
Stay at base altitude (≤2,500 m) for at least 24 hours before any higher move. Limit daily elevation gain to 300-500 m above that level and include a rest day around 3,000 m if you plan to continue. This approach lowers AMS risk and keeps climbers on a safe trajectory. Heading into the mountains, keep your energy steady with regular meals and plenty of fluids, and dress in breathable layers to adapt to shifting conditions outside.
Base phase: arrive at 2,000-2,500 m and stay 24-48 minutes? 30-60 minutes of light activity on the trail to gauge your response. Keep walking at a relaxed pace, avoid running, and allow your body to acclimate. If you feel well, you can progressively add short walks along the needles-lined path, but discretion is key.
Gradual gain window: after the initial 24-48 hours, limit elevation gains to 300-500 m per day above base. For example, move to 2,800-3,000 m and sleep at 2,700-2,900 m. Take a rest day below 3,000 m before attempting higher terrain. If you walked a steady pace and your symptoms remain absent, you can continue, but listen to your body–acclimatize before pushing pace.
High sleep option: if after two acclimatization days you feel strong and there is no headache or sleep disruption, consider one night at 3,000-3,200 m. Otherwise dont push above 3,000 m until you’ve proven you can tolerate the elevation. It took many climbers several days to feel fully comfortable, so pace yourself and keep your equipment ready, including a warm layer and windproof shell.
Final ascent window: when you can sleep well at or above 3,000 m with no AMS signs, you may attempt higher sections. Know that the italian staff at italy-based refuges can offer guidance, beds, and medical support if needed. Price varies by season and availability; plan ahead and keep a flexible schedule.
Effective acclimatization requires discipline: keep pace with your own fitness, monitor for symptoms, and never jump past your comfort threshold. Thank you for prioritizing safety–your preparation helps you enjoy the gorgeous alpine scenery and the quiet of the needles and crags. If you have questions, the staff can help you tailor a plan that fits your itinerary, your equipment, and your level of experience. Youre not alone out here.
Dress in a three-layer system: base, mid, and shell; you should choose moisture-wicking fabrics and avoid cotton; equipment should include crampons, a stiff-sole mountaineering boot, an ice axe, a helmet, and a harness; carry a 30–40 m dynamic rope for glacier sections and two locking carabiners for anchors.
Leave nonessential items at the trailhead, stay with your group, and know where to pause for rests to manage altitude symptoms and fatigue.
Five essential layers: base layer for moisture control, a warm mid-layer, a fleece or synthetic puff, a waterproof shell jacket, and waterproof pants; dress to protect core, arms, hands, head, and feet across wind, snow, and sun.
On the nidaigle stretch, the petit hamlet nidaigle marks the halfway point; movement becomes deliberate on the side valley, and you can admire a breathtaking panorama across ice and rock.
Footwear must be rigid, mountaineering boots compatible with 12-point crampons; add gaiters to seal ankles against snow; bring an extra pair of socks and a spare insole for warmth; foot placement matters for stability on ice and rock.
Equipment list (daypack): harness, helmet, crampons, ice axe, rope (30–40 m), slings, locking carabiners, headlamp with spare batteries, map, compass, optional GPS, altimeter watch, first-aid kit, bivy or emergency blanket, whistle, knife, duct tape, and spare batteries.
Tramway-side access points mean you may rely on rail links to the valley floor; have a detailed plan and keep maps handy in case of weather shifts; know where to retreat if storms roll in.
Walks span snowfields and rocky sections; wear sunglasses and sunscreen, carry lip balm, and hydrate regularly; viewpoints are frequent and the scenery is breathtaking as you traverse the crevassed terrain, so admire the viewpoint when you reach a safe ledge.
Group coordination: for a group of five, fix a simple rope system and rotate leadership to keep movement synchronized; practice communication and step cadence; the verte segment along the ridge demands calm and deliberate steps.
Later you might take a longer break at nidaigle or Nid d'Aigle if weather allows; if delays occur, re-evaluate plan and descend to safer altitudes and lower valleys.
Weather and safety: monitor near-term forecasts, set time targets for breaks, and avoid staying above the treeline with late afternoon shifts; have a backup plan for turning around before it becomes dangerous, and you may already have enjoyed the surrounding light when you reach the final stretch.
Book ahead via the official mont-blanc hut network for the five most popular refuges, and reserve a bed or dorm space two to three months in advance. Arrivals should aim for 19:00–20:00 to guarantee entry and dinner; if you wait, you would risk limited options and a later night.
Timings vary by hut, but check exact hours on the official page before heading out. In peak season, huts typically accept guests from around 12:00, with check-in continuing until around 20:30, and some locations offering post-dinner access for late arrivals if pre-booked for a group.
Overnight options include dormitory beds, mixed or private rooms, and occasionally private huts. High-season prices usually range from €50 to €90 per person for half-board, with extra charges for beverages or private rooms. For a group of five, ask for a bundled rate to keep the walks simple and avoid unnecessary waiting.
Bookings should be made through official channels; avoid unofficial aggregators to prevent miscommunication. Print confirmations and carry ID. Some huts require a local contact person. If a hut is fully booked, consider adjacent refuges in the same valley, which often offer similar menu and timings, and can provide access to bains and shorter approaches.
Walks to refuges traverse varied terrain. Forests are lush in midsummer, and access may include glace and snow higher up; be prepared for a colder wind on exposed sections, with a sharp descent on the final pitch. Typical ascent times from the valley range from two to five hours, depending on route and snow conditions. Always carry a map, proper footwear, and a small light for finishing after dusk if continuing to higher huts or returning after dark.
From argentière, a common plan is a quick ascent to a lower shelter plus a second stop at another hut, allowing a group of five or fewer to spread the load. This visit pattern is visited by many, and it provides an easier progression and a safer entry to the network. If you would prefer to enter the chain gradually, choose huts with shorter approaches and five hours of walking in total.
Start pre-dawn from vallorcine and aim to reach the summit at sunrise; descend before noon; boots with good grip and crampon compatibility; carry a spare dry layer, headlamp, and extra batteries; consult a local mountaineer for current conditions, and booking a guided ascent would help, especially if this would be your first climb; those who climbed here would tell you weather can flip in minutes, therefore stay away from exposed spots and capture the view while it lasts; there are baths in nearby valleys for post-climb recovery, and plenty of time to plan the route.
Weather reality: mornings are cold with frost and low humidity; winds can gust above 60 km/h above 3,000 m; visibility can drop quickly in snow; official forecasts from local services should be consulted; if a storm forms, turn back and descend to vallorcine or a sheltered spot; the route remains accessible only along marked lines, so avoid loose ground and exposed ledges; therefore start early and make a precise plan around the sunrise window; there are plenty of opportunities to rest in sheltered spots and maybe capture a panorama, then descend with care; if conditions look unfriendly, pivot to an alternative route or cancel and return to the valley baths or village inns.
Coordinate with neighbors in huts or refuges; name your route and timing, and share it with local staff or your booking contact; if the main route closes, there is an alternative below the ridge; there is plenty of daylight to complete a safe descent if you stay with your group; for first climbs, consider a guided option to gain real-time route advice and a safe turnaround point.
| Hazard | Mitigation | Notes |
| Cold, wind, and whiteout | Layered clothing, insulated jacket, wind shell, hat and gloves; helmet in exposed sections | Turn back if visibility drops below 5–10 m or wind becomes unsafe |
| Ice, crevasses, and rockfall | Crampons/ice axe when needed; rope up on exposed sections; helmet | Move with a partner; test footholds before committing |
| Altitude fatigue | Hydration, snacks; steady pace; short rests | Descend if early signs of altitude illness appear |
| Navigation error | Map, compass or GPS; stay on marked spots | Establish a clear turnaround point and stick to it |