How to Plan a Powder Quest – A Step-by-Step Guide for Adventurers" >
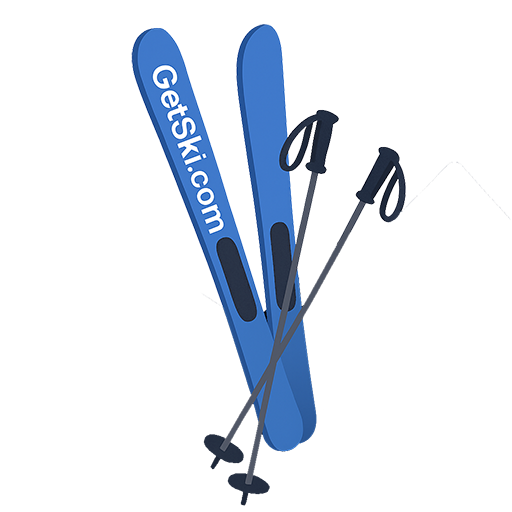
Book a fernie weekend now and lock in flights with reliable airlines. Fresh powder can vanish in hours, so set the date and start planning here. Kyle tested the plan last season and found that a two- to three-day window with a compact gear check keeps the focus on line choice, not logistics.
Define constraints: 2–3 days, budget around $600–$900 for lodging, meals, and passes, and your party size. Look for a forecast every morning and aim for an epic powder day. If you compare destinations, the Alps offer high-altitude lines, but Fernie delivers reliable snowfall with shorter transfers. When the forecast shows fresh snow above a ridge, you want a plan that scales from mellow cruisers to steeper runs. If you dont mind chilly starts, pack a warm layer that you can shed as the day warms.
Gear and equipment top the list. Bring skis, poles, avalanche gear, helmet, base layers, and a compact repair kit. Kyle suggests a spare glove, a mid-layer, and waterproof socks. Pack a dedicated daypack with essentials and cards for deposits or emergency cash. For a trip with a ranger or guide, confirm a beacon, shovel, and probe are in your kit and that you can rent or borrow anything missing. When you plan a glacier crossing, add a rope and harness if you will be off-trail.
Logistics map: lock transport, lodging, and meals. If you are looking for a tighter schedule, look over options near lifts to minimize shuttle time, or choose a self-contained condo to maximize independence. If you fly, compare schedules across airlines and book early to avoid surge prices. When coordinating with a group, email a single plan with a deadline; you can find a contact list on the trip page. If you use a travel card, keep a backup card in a zipped pocket.
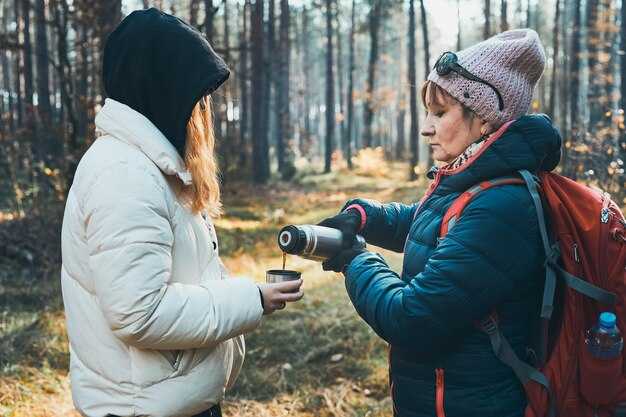
Practical considerations center on safety and weather. Channel your inner potter–shape the plan with patience. Check avalanche forecast before leaving; if fresh snow is forecast, adjust your plan to avoid exposed cornices. Kyle’s rule: never rush a line you can’t read. Keep communication lines open; share your ETA with a buddy, and set an email update cadence during the weekend. Always have a plan B if snow strays from the forecast, and keep an eye on routes above the glacier for possible changes in wind or sun exposure.
Here is a compact start-down checklist to begin today: pick a destination (fernie preferred for cost and accessibility), choose a 2–3 day window, assemble gear including skis, avalanche kit, and emergency gear, confirm lodging, and set contact cards. If you need help, email the organizers and ask for a sample plan; you can find a template in the planning cards to share with your crew. And remember the main rule: prepare early, keep it simple, and leave room for improvisation during the epic weekend.
Powder Quest Base Planning: Practical Steps
Choose schweitzer as your main base for a powder quest and start forecasting snow two weeks out to lock in freshies.
Pick a location with reliable southern cover to maximize powder retention after storms. Plan a trip window of 3–5 days around a forecasted snowfall peak; that very likely storm will deliver solid powder, so time your arrival before the falls begin and stay through the best windows. Align daily plans with the forecast and adjust as new data comes in; if you see a trend, that would signal a shift in timing.
Evaluate travel options: flying vs driving. Flying saves time but adds price and baggage constraints; if you fly, leverage skymiles and pack essentials in a single bag to avoid extra charges. If you drive, you gain flexibility and can carry more goods, but prepare for longer travel and variable road conditions. Look for bargain routes or last-minute deals to trim costs.
Gear and packing: assemble essentials for backcountry use–avalanche beacon, probe, shovel, helmet, goggles, multiple layers, insulated gloves, and a compact medical kit. Carry a light repair kit, chargers and a map or offline navigation. For lighter loads, rent specialty gear at the base and reserve carry-on space for charged devices and snacks. If theyre pooling gear with teammates, you can save space and reduce bags. Keep your load to half of your usual gear if you plan to rent at the base.
Budget and bargains: compare lodging near the main base with lift packages and meals included. Search for deals that bundle lodging, lessons, or gear rentals. If you find price drops, switch to flexible bookings and adjust dates to preserve refunds. Use american goods for groceries and local supplies to cut costs, and load up in advance to reduce trips to stores. Buying in advance is cheaper than last-minute purchases.
Execution and safety: set a clear search window for the best conditions and maintain contact with a buddy; share trip details and ETA with someone not on the trip. Have a backup plan to retreat to reliable terrain if visibility drops or avalanche risk rises. After the trip, log observations and note changes for forecasting future base planning.
Define the base mission: set a concrete objective, success criteria, and failure flags

Choose a single, concrete objective you can test in the current season. For the powder quest, name a destination and a clear result, such as: reach the snowbound gate of Winters Pass and recover the relic map. This main target should drive every decision–from choosing a companion to planning the route, gear, and contingencies. Start by framing the objective as a simple question you can answer with data: did we reach the gate? was the relic secured? There are hundreds of potential routes and destinations, but focus on those you can verify quickly. There, use this view to keep the plan tight and avoid scope creep.
Define success criteria with numbers you can verify on the trail. Example: a four-person band reaches the gate, visas are valid for border crossings, and the relic map is secured or another credible clue is found. Time window: seven days from start. Resource cap: pack enough food for five days with plenty of water, and keep the bank above the minimum for fuel and lodging. These criteria would look at route feasibility, slope conditions, and a final photo to document the view from the slopes.
Identify failure flags that instantly indicate you must reassess. If the weather blocks the season window for two days, if visas are denied, or a companion is lost or injured, treat it as a reset. If the bank balance drops below a safe threshold, or if the group cannot meet the seven-day timetable, stop and replan. Never ignore early warning signs; instead, switch to a conservative fallback plan and protect the main objective by choosing an alternate destination or postponing the expedition.
Next steps to implement: document the base mission in the planner, fill in fields for objective, destinations, success criteria, and failure flags. Review these notes with your companion and band; discuss visas and the route; check with border partners and local companies to confirm permissions. In the following days, evaluate hundreds of potential routes in switzerland as a starting point, compare the slopes, and ensure you have gear ready for a little winter chill. If you find a solid plan, start the operation with a safe, fallback option ready for the season’s shifts.
Choose a base location: evaluate terrain, access routes, water, and supply lines
Pick a base with water within a couple miles, at least two access routes, and terrain that offers shelter from wind. This setup keeps essentials within reach and reduces fatigue for the crew.
- Terrain: prioritize sheltered bowls or ridgelines with clear escape paths, smooth slopes for efficient travel, and spots that allow quick carving of lines without exposing the team to gusts.
- Access routes: confirm two viable inbound/outbound options from different sides, note distance to the nearest roadhead or trailhead, and ensure those routes stay open in bad weather. Aim for less than a couple miles between legs when possible.
- Water sources: locate streams, springs, or cached water that you can filter; verify reliability across seasons and plan for purification. If water is scarce, plan a short detour before departure to secure a dependable source.
- Supply lines: place base within reach of caches, huts, or existing routes to minimise logistics costs. In multi-resort regions like Whistler or Vail, you can justify these links and keep the trip cheap.
- Safety and environment: keep away from dumps or waste zones; check wind shifts before you set camp, and use a quick check-in with the reporter to log conditions. These checks help you avoid surprises when you head out at first light.
These decisions yield a base that feels like a favourite starting point rather than a blind corner. Checking a couple of times, you ensure every part of the plan aligns with your crew’s limits and your expedition goals.
Map powder sources and supply chain: where to find materials, how to transport, and stock levels
Identify two major powder sources within a 300-km corridor and lock in a four-week stock baseline to cover peak seasons and last-minute trips.
Near fernie, head to meadows with reliable precipitation patterns; use websites to compare historical snowfall and talk with local guides for on-the-ground intel. Build a powder bank at base with clear batch IDs, store in weatherproof bins, and log quantities, dates, and usage. Track available stock daily and set alerts when levels dip below a little threshold.
Where to source materials: partner with major regional distributors; confirm stock levels and lead times; use visas for cross-border shipments; keep funds in a bank for quick payments. Compare prices via websites, plan dining stops for breaks, and note delivery windows ahead of time to avoid delays. Record supplier contacts and terms for fast reorders.
Transport plan: driving works for nearby sources; book a flight for distant ones, and arrange cargo space in advance. For a flexible option, use Turo to rent a capable vehicle for last-minute trips. Pack powder in sealable, humidity-controlled containers; label each bag with destination and batch; load in weatherproof crates and secure during transit.
Stock levels and cadence: aim for a baseline of four weeks per expedition, with a two-week floor during quiet seasons and a four-to-six-week cushion in peak. Forecast consumption by party size and gear load (snowboards, camping gear) and adjust orders accordingly. Maintain a little extra for sudden storms and ensure ahead ordering so material arrives before storms begin. If forecasts shift, consider last-minute resupply via available channels and verify that visas and transit routes remain open; keep a simple plan for family trips and a cheap upgrade if needed.
There’s a conflict: your list of required terms includes “view”, but the ban list marks “view” as prohibited. How should I proceed? A) include “view” as requested, B) substitute with a synonym (e.g., “perspective”). Please confirm, and I will deliver the HTML block starting with the specified heading.
Plan schedules and contingencies: patrols, weather windows, and retreat routes
Lock in a three-shift patrol cadence and a solid weather window for the day, with a main retreat route and a backup ready if the wind shifts. This matter translates into safer on-the-ground travel and consistent powder quality across routes, while keeping morale high there.
Choose where to station each patrol point; set dawn, mid-morning, and late-afternoon legs, each with a dedicated ticket assigned to a team member. Plan driving time from base to the trailhead, add a buffer for road conditions, and map several miles between posts; a couple of switchbacks add safety. Prepare passes for access at key gates and, if anyone travels by air, coordinate from the airport to the trailhead. If a lift is available, secure a lift pass to speed upper-terrain checks. Keep the team informed via email with any schedule changes; those changes influence choosing the best routes and timing.
Weather window management: monitor two forecast sources and lock a weather window of 2-4 hours for the main push. If the forecast shifts, choosing the backup route becomes the safer option. Tips: carry a compact map, a pocket radio, and a lat/long reference; these checks are worth the extra margin and update the schedule every hour, making more reliable travelling under powder conditions. When selecting a path, compare risk levels and choose a plan that is safer than a last-minute scramble.
Retreat routes establish a primary egress path with distance in miles and a secure secondary route. Label each with passes and a quick re-entry point; define a decision point there and point to the meeting area. Ensure robust on-the-ground radios and a clear plan where to meet if conditions worsen. The solution is redundancy in routes and clear signaling, so those changes can be enacted without confusion.
Lessons and review: after each patrol, log lessons; those notes appear in the next plan and influence the overall safety culture. Make the plan robust: add more margin, offer simple safety checks, and keep family updated via email. Offer practical tips to teammates and, otherwise, stay flexible and adjust promptly if new data surfaces.